Stud Spacing Calculator
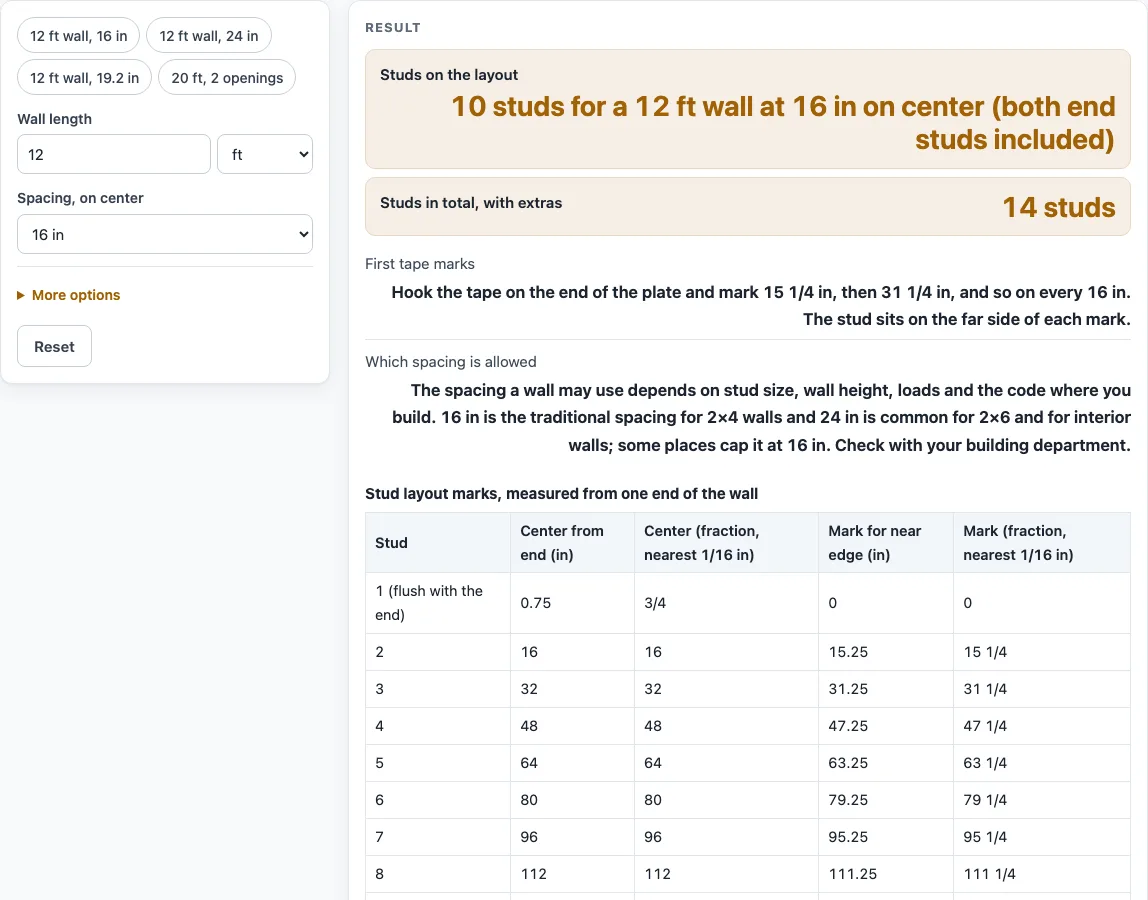
Enter the wall length and the spacing to get the stud count and a table of tape marks measured from one end, starting at 15 1/4 in for 16 in on center.
Recent
Your last 10 settings, saved only in this browser. Nothing is uploaded.
How to use the Stud Spacing Calculator
- Type the wall length into the “Wall length” control.
- Choose its unit: ft, in, m or cm.
- Pick 16 in, 19.2 in or 24 in in the “Spacing, on center” control.
- Open “More options” if the wall has corners, doors or windows.
- Set “Corners” and “Extra studs per corner”. The defaults are 2 corners with 2 extra studs each.
- Enter “Doors and windows” and “Extra studs per opening”.
- Read “Studs on the layout”, which includes both end studs, and “Studs in total, with extras”, which adds the extras you set.
- Check “First tape marks” for the first two marks, then scroll to the marks table. It lists each stud’s center and the mark for its near edge, in decimals and fractions to the nearest 1/16 in. The first stud sits flush with the end at mark 0.
- Check for messages before you use the numbers. An error appears for a length of 0, a value that is not a number, a wall under 3 in, or negative or fractional counts. A warning appears for a wall longer than 100 ft.
The page also has four presets: “12 ft wall, 16 in”, “12 ft wall, 24 in”, “12 ft wall, 19.2 in” and “20 ft, 2 openings”. Pick one to fill in the inputs, then change any value to match your own wall.
How is the number of studs calculated?
The count starts with the wall length divided by the spacing. The tool uses floor(length / spacing) + 1 studs on the layout. For example, a 12 ft wall at 16 in is 144 / 16 = 9, so the layout has 10 studs, counting both end studs. If the length is not a multiple of the spacing, one more stud goes flush with the far end. The extras you set for corners and openings are then added to that total.
Here are three worked cases. A 10 ft wall at 24 in is 6 studs. A 12 ft wall at 19.2 in gives floor(7.5) + 1 = 8, plus an end stud, for 9. A 20 ft wall at 16 in with 2 corners and 2 openings of 4 extra studs each is 16 + 4 + 8 = 28. The corner extras are your choice. Some advanced-framing guides build corners with two studs instead of three, so the default of 2 extra studs per corner is a setting you can change; the tool does not say how many your plan needs.
Where do the tape marks go?
Each mark tells you where a stud’s near edge should land when you measure from the starting end; the stud sits on the far side of the mark. Layouts differ on where the grid starts: this tool puts the first stud flush with the end, and the table shows both the center and the edge mark of every stud. A 2x stud is 1-1/2 in thick, so its edge sits 3/4 in before its center. For 16 in spacing, the first mark is 16 - 3/4 = 15 1/4 in, then 31 1/4 in, 47 1/4 in and so on. For 24 in spacing the marks are 23 1/4 in and 47 1/4 in. For 19.2 in spacing the first mark is 18.45 in, which the table rounds to 18 7/16 in.
These marks also help with sheet goods. A 48 in sheet edge lands on a stud center at 16 in and 24 in spacing, since 48 / 16 = 3 and 48 / 24 = 2. At 19.2 in it does not, since 48 / 19.2 = 2.5. A 96 in edge lands on a center at all three spacings, with 6, 5 and 4 spaces.
Spacing sources do not all agree, and a spacing is not a rule for your wall. Traditional spacing is 16 in on center for 2x4 walls. The US Department of Energy recommends 24 in on center for 2x6 walls and for 2x4 interior walls with single headers. Some places, such as hurricane zones, set 16 in as the maximum. The page does not say which spacing is allowed for a given stud size, height or load. That depends on the stud size, wall height, loads and the code where you build. The tool is not a substitute for an engineer, an inspection or a permit.
Sources (checked 15 October 2026): bsesc.energy.gov · basc.pnnl.gov · nist.gov · altitudecraft.com · swansongroup.biz
Worked examples
| Input | Result |
|---|---|
| 12 ft wall at 16 in on center | 14 studs |
| 10 ft wall at 24 in on center | 6 studs |
| 20 ft wall at 16 in on center | 28 studs |
| 13 ft 1 1/2 in wall at 19.2 in on center | 10 studs |
Calculated by the tool above; open it with the same values to see each step.
Frequently asked questions
Is 16 inches on center the standard stud spacing?
16 in on center is the traditional spacing for 2x4 walls. Other spacings are used in some cases, so the right choice depends on your stud size, wall height, loads and local code.
Can I use 24 inch stud spacing?
The US Department of Energy recommends 24 in on center for 2x6 walls and for 2x4 interior walls with single headers. The tool lets you select 24 in, but whether it is allowed for your project depends on your local code.
Why is there a stud at the end of the wall when the length does not divide evenly?
When the length is not a multiple of the spacing, the tool adds one more stud flush with the far end. The marks table shows where it sits.
What do the extra studs for corners and openings mean?
They are additions on top of the layout count. How many extra studs a corner or opening gets is your choice; for example, advanced-framing guides build corners with two studs instead of three, which is 1 extra. The default is 2 corners with 2 extra studs each.
Why does the first tape mark sit at 15 1/4 in for 16 in spacing?
A 2x stud is 1-1/2 in thick, so its edge is 3/4 in before its center. The first stud’s center is at 16 in, so its near edge mark is 16 - 3/4 = 15 1/4 in.
Does this tool upload my wall measurements?
No. Everything is calculated in your browser, and nothing is uploaded. The tool is free and needs no sign-up.
Related tools
- 2x4 Dimensions: Check the actual size of a 2x4 when you plan wall thickness and stud layout.
- Board Foot Calculator: Estimate the lumber volume for a framing order.
- Floor Joist Spacing: Compare joist layout with the wall spacing you have chosen.
- Lumber Dimensions: Look up nominal and actual sizes for other framing lumber.
- Lumber Weight Calculator: Estimate how heavy your studs or other lumber will be.
- Plywood Sizes: Find common sheet sizes to compare with your stud layout.
- Plywood Thickness Chart: Check sheet thickness when you plan wall sheathing.